
Spinal alignment is like turnout, says Michael Kelly Bruce, associate professor of dance at The Ohio State University. “It’s a mechanism, not an aesthetic.” But as with turnout, dancers’ visual goals often lead them to force their bodies into unnatural positions. “A healthier spine has to do with acknowledging the structural integrity of what’s there, as opposed to changing it to meet that aesthetic,” he explains. He compares a spine without its natural curves to winging the foot. “It’s gorgeous in arabesque, but you don’t want to stand on it. It’s not very supportive,” he says. Ballet dancers are particularly prone to extremes in erasing the curves from their backs. “People from New York City Ballet dance gorgeously, but in my opinion, their spines are weird,” says Bruce.
In his classes, Bruce coaches students to understand their torsos in three dimensions. When cueing dancers’ spinal flexion, he focuses on lengthening the back rather than contracting the front. “The images I work with are on the opposite side,” he says. “It’s about lengthening the vertebra away from one another, and as a result, the front works.”
Having dancers work on movement while lying on the floor is particularly helpful, he says, because it lets them use gravity in a different way to make familiar movements easier or more challenging. Here, he shares a floor series for finding mobility, stability and length in the spine.
Finding Spinal Articulation on All Fours
In this series, Bruce asks students to focus on the expanding side of the body more than the contracting side to stay aware of the torso’s three-dimensionality.
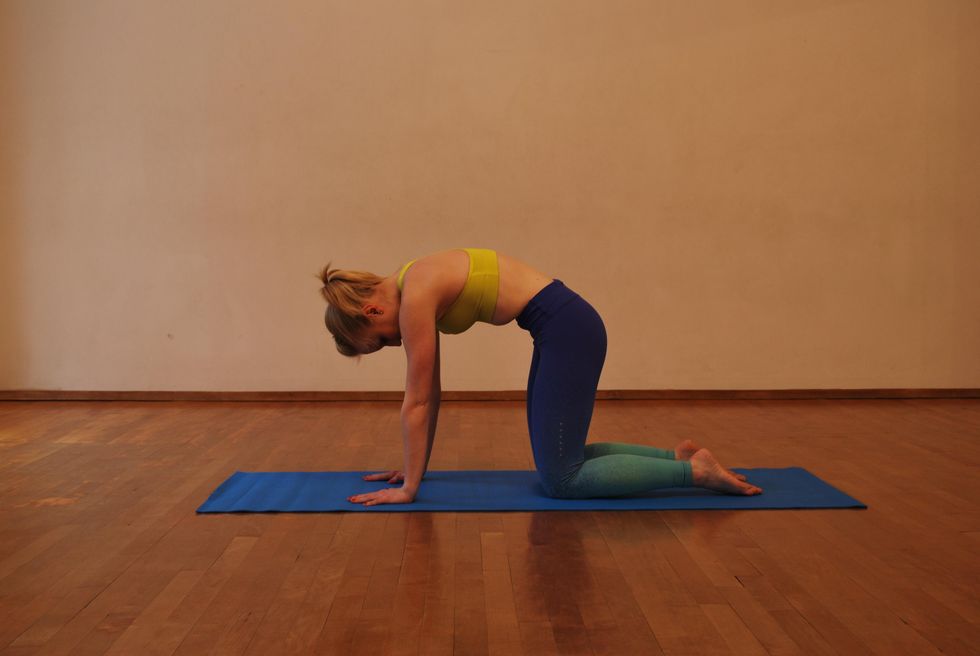
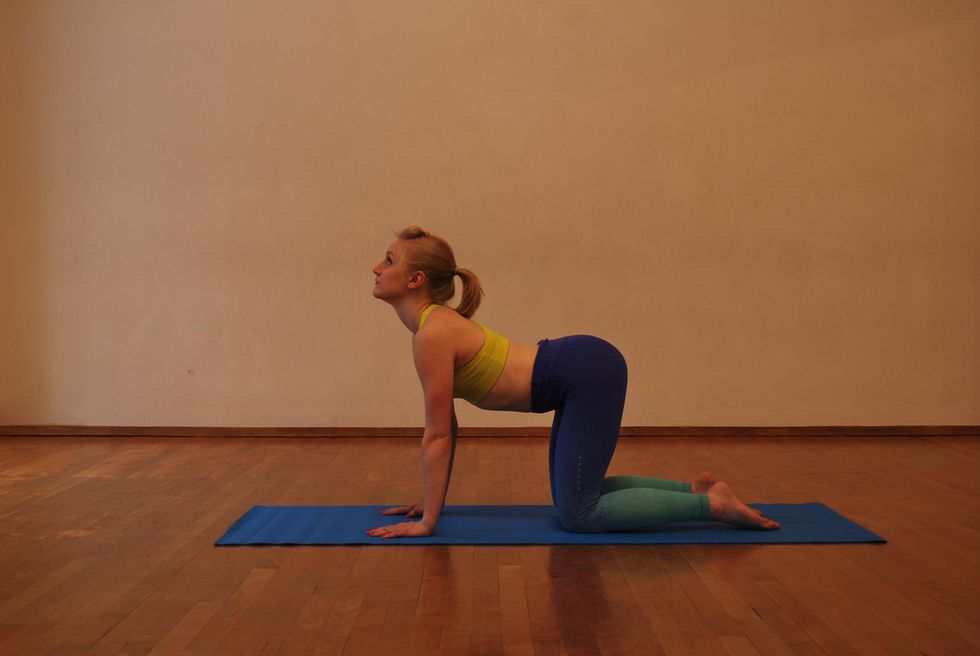
Cat/Cow
 Tabletop. Photo by Emily Giacalone
 Cat. Photo by Emily Giacalone
 Cow. Photo by Emily Giacalone
• Begin in tabletop position on hands and knees with your spine’s curves intact and your scapula lying flat.
• Inhale and feel your ribs expand.
• Exhale and curve the spine from tail to skull, articulating through each vertebra. As you move through the upper thoracic, pull your scapula away from each other.
• Inhale and expand into the dome shape.
• Exhale, flexing the hips as you lengthen out through each vertebra, establishing the curves of the spine back to your tabletop position.
• Inhale, lifting your eyes and sitz bones at the same time to cow. Don’t drop into it; instead, extend the spine.
• Exhale, lengthening all four sides of the spine back to tabletop position.
Lateral Flex
 Photo by Emily Giacalone
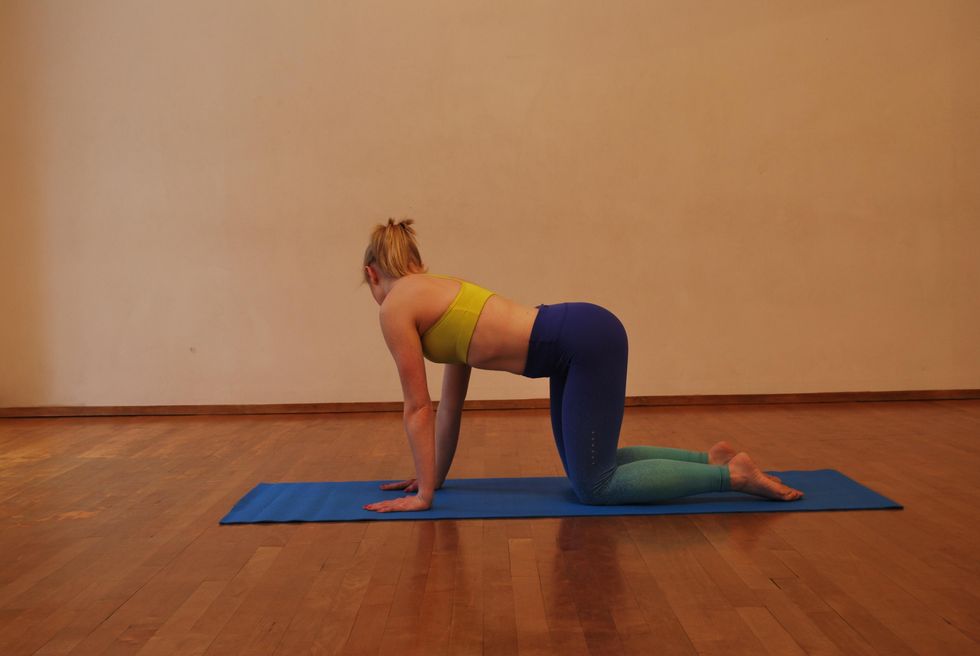 Photo by Emily Giacalone
• Exhale to lengthen your right side (bending to your left), drawing the right side of the rib cage away from the pelvis and right ear away from the sitz bones. Return to the starting position.
• Repeat four times on the exhales, then four times on the other side.
• Then do four sets on each side moving as you inhale.
Around the World
• Exhale, lengthening your spine in one action to cat.
• Inhale, lengthening your right side to move into a side bend to the left.
• Continue inhaling to cow.
• Exhale straight back up to cat.
• Repeat for a total of four half circles this direction. Then go the other way.
• Finish on an exhale in cat, feeling your posterior ribs expanding. Exhale to lengthen back to tabletop.
Love Your Curves: Spinal Edition
The typical spine has four curves from bottom to top—sacral, lumbar, thoracic and cervical—and correct posture doesn’t mean flattening them out. On the contrary, it is essential to actively support those curves. Looking from the side, someone should be able to draw an imaginary line from a dancer’s earlobe through her shoulder joint, hip and knee, ending just in front of the ankle joint. Maintaining correct alignment takes some strength, however. That’s why dancers who haven’t developed abdominal strength often have a swayed lower back.
When making corrections, sometimes dancers overcompensate, leading to tucked bottoms or a jutting chin. Here’s how some of our experts help dancers find alignment without overshooting.
 Irene Dowd
Photo by Kyle Froman
Place a fingertip on the crown of the dancer’s head, right above the ears. Tell the student to get taller, pressing against your finger toward the sky. Be careful not to place your finger too far forward, or you’ll encourage the student to tilt her head up instead of growing taller through her central axis. —Irene Dowd, anatomy expert, The Juilliard School
 Denise Wall
Photo by Matthew Murphy
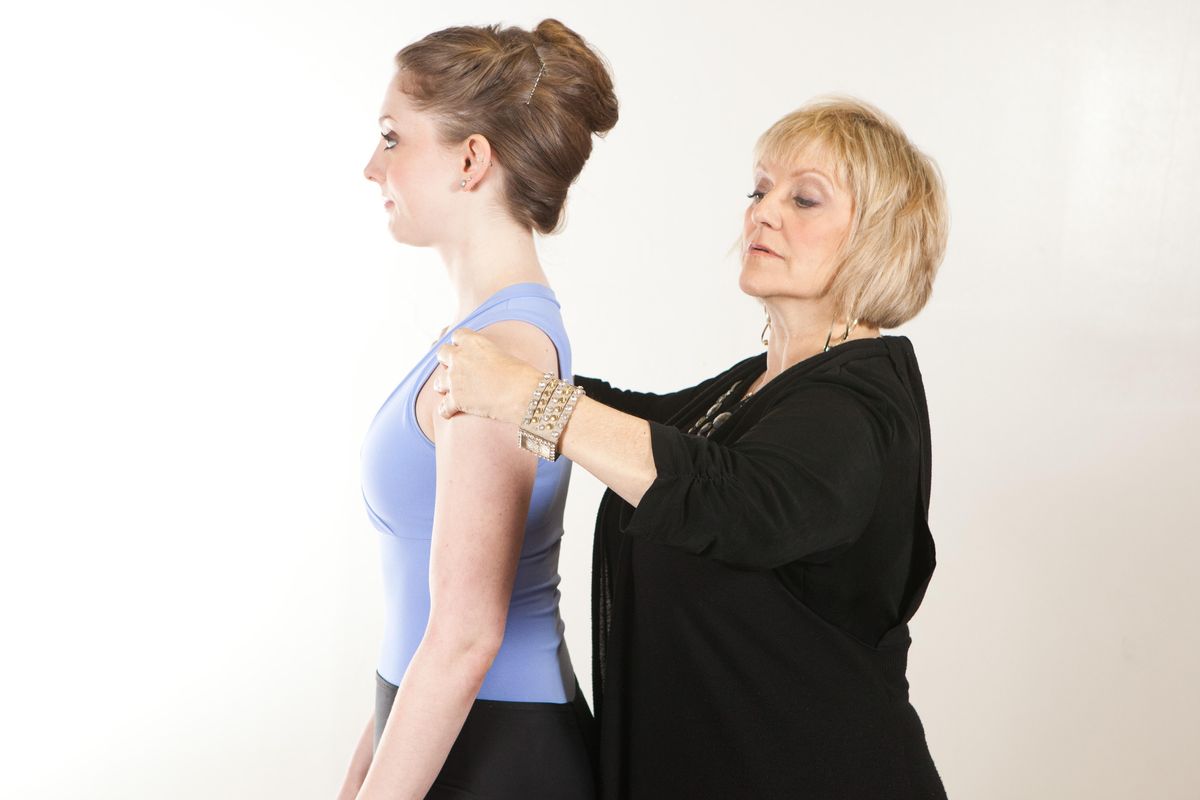
Standing behind the student, hold the shoulder joints between your fingers and thumbs, and pull them apart gently. Have the dancer imagine her body is a letter T, with the torso as the vertical line and the shoulders along the top. This helps spread her back muscles away from the spine instead of pinching the shoulders back and sticking out the ribs or hunching the shoulders forward. —Denise Wall, teaching alignment through imagery at Denise Wall’s Dance Energy
 Megan Williams
Photo by Kyle Froman
Finding the neutral pelvis can be tricky, because dancers have strong muscles that want to take over, like glutes and quads. Have a student take a demi-plié, and feel how the pelvis hangs without much support. Have her try to maintain the vertical position of her pelvis as she straightens her legs. There should be a crease at the front of her hips. Tucking erases that crease. —Megan Williams, former Mark Morris Dance Group company member


