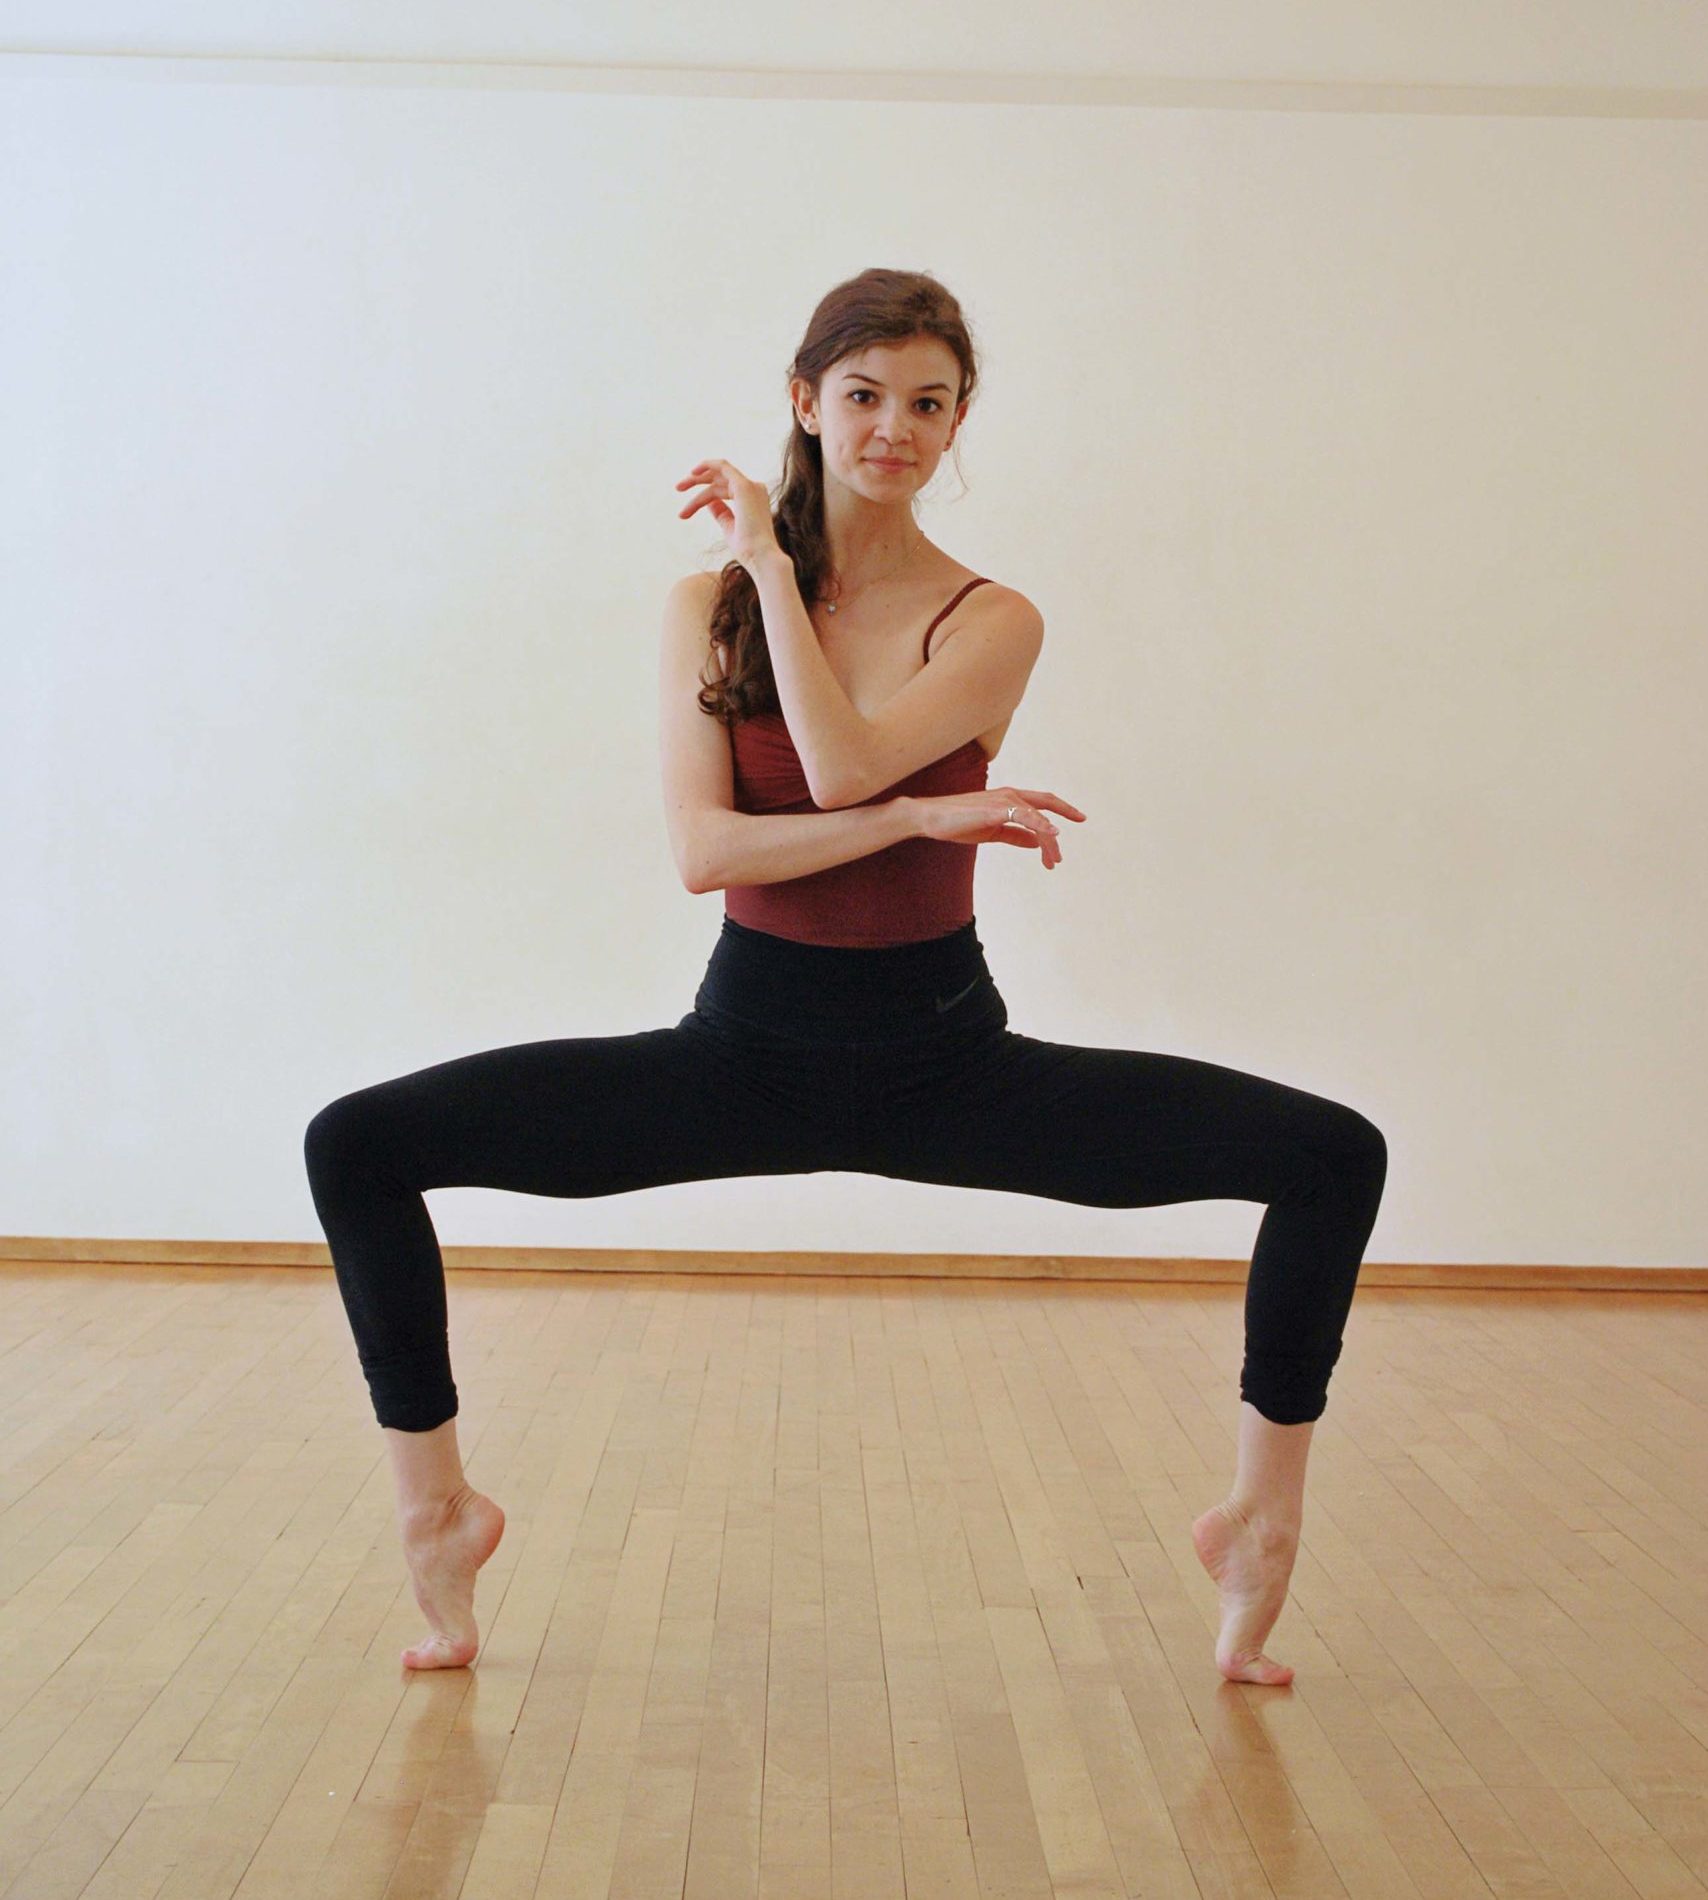
While she was a teenager studying at Boston Ballet School, ballet teacher Olivia Hartzell underwent two surgeries in the same year. She was suffering from os trigonum syndrome, or pain caused by an extra bone behind the ankle. (Many people born with the extra bone don’t even know it’s there, but for dancers, it can make it excruciating to jump or even point the feet.) Removing the bones relieved Hartzell’s pain and created new mobility in her ankles. Her post-surgery rehabilitation helped her build strength and stability to support the increased range of motion.
Even without surgery, dancers tend to have hypermobile joints and can benefit from a strengthening regimen like Hartzell’s. The problem with loose ankles is that they make it tough to balance on relevé without wobbling and they put dancers at great risk for injury. And in that sense, weak ankles are a self-perpetuating problem. The most common sprain, which occurs by rolling over the pinky-toe side of the foot, overstretches or even tears the ankles’ anterior and lateral ligaments, destabilizing the joint and making the dancer more susceptible to repeating the injury.
Wobble-free balance—a sign of ankle stability—requires strength in the smaller muscles on all sides of the lower legs and ankles: the peroneals, the tibialus posterior and anterior and the flexor hallucis longus. Many dancers overuse their calf muscles, the gastrocnemius and soleus, when trying to find balance on relevé, says Kendall Alway, owner of SF Performing Arts Physical Therapy. “It’s helpful for getting into relevé, but it doesn’t stabilize you,” she says. In other words, it gets you there, but that muscle alone won’t keep you there.
To engage those smaller muscles, Hartzell performed exercises on a BOSU ball as part of her rehabilitation: She practiced pliés and relevés in parallel, eventually graduating to turned-out passé and arabesque. To further challenge the stabilizing muscles in her legs and ankles, she looped a TheraBand around one ankle and tied it to the base of the barre for some external resistance. In this setup, Hartzell did pliés and relevés in parallel and first, making sure the knee tracked directly over the ankle and that she released the Achilles tendons in plié. The exercise helped promote proper alignment in her knees and ankles while also challenging her hip stabilizers to keep her weight over her supporting leg.
You shouldn’t wait for a surgery or injury to build muscles in your ankles and lower legs. Strong ankles support solid, beautiful lines and protect dancers while they’re moving, whether through quick direction changes, landing from leaps, turning or balancing on pointe.
Here are some of Alway’s favorite ankle-strengtheners that you can add to your routine:
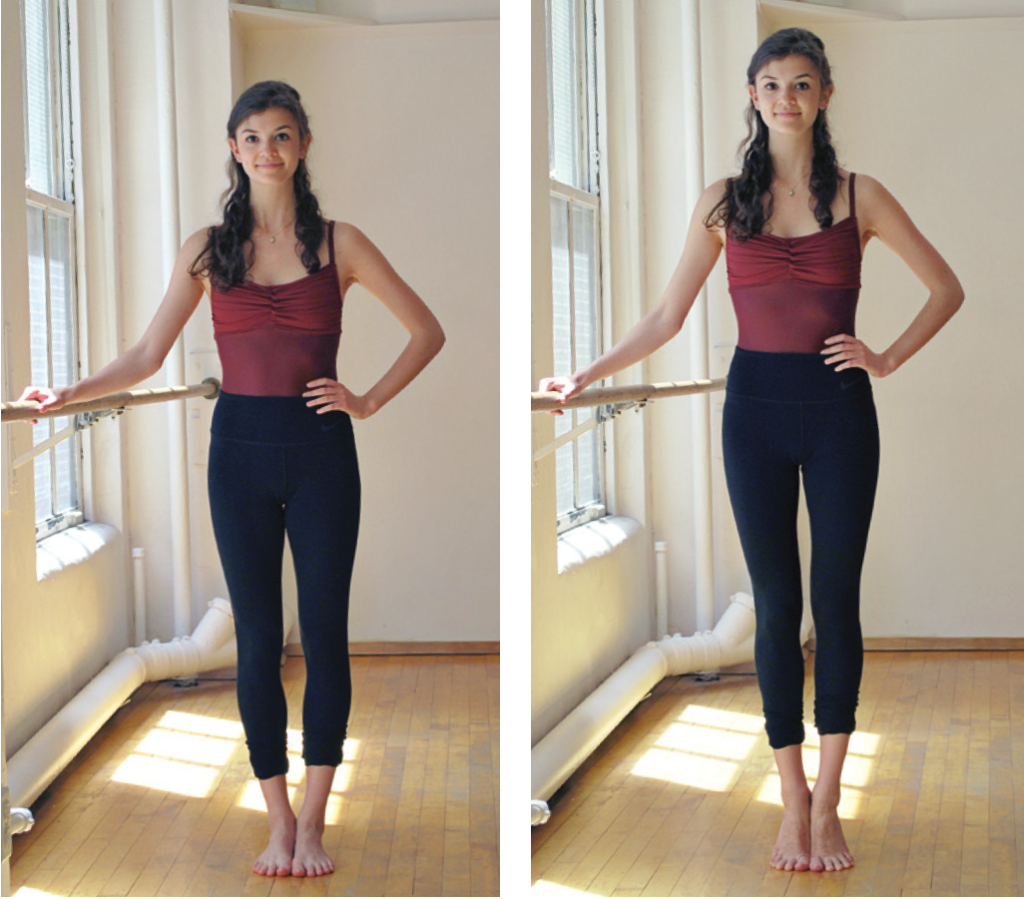
Pressed Parallel Relevés
This exercise helps you practice bearing weight in relevé over the correct part of the foot—between the first and second toes.
1. With a hand on a barre or lightly touching the wall for balance, stand in parallel with toes and heels together. Make all the skin between the two feet touch.
2. Rise up onto full relevé without allowing any space between the anklebones. Slowly lower. Do 10 reps three times a day.
If this is uncomfortable, try holding a tennis ball between the feet, but don’t allow the feet to wing or sickle.
Four-Way Resistance-Band Workout
These exercises strengthen stabilizing muscles all the way around the lower legs. Start with 10 reps of each variation.
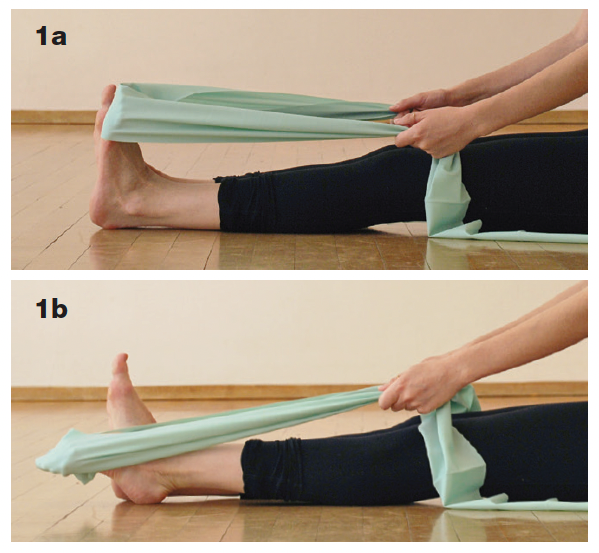
1. The basic pointe-and-flex: Sitting on the floor with legs straight out in front, loop the band around one flexed foot at a time so you can focus on pressing sequentially and slowly through ankle, ball, toe, then back through toe, ball, ankle. Keep your working heel on the ground.
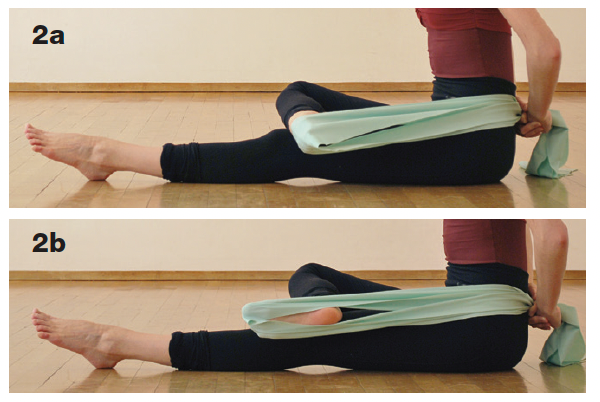
2. Cross the right ankle over the left knee, making a figure-four shape. Wrap the band around the right toes and use two hands to hold the ends of the band behind your back at your left hip. Pointe and flex slowly, avoiding winging or sickling the foot. Switch legs and hold the band at your right hip.
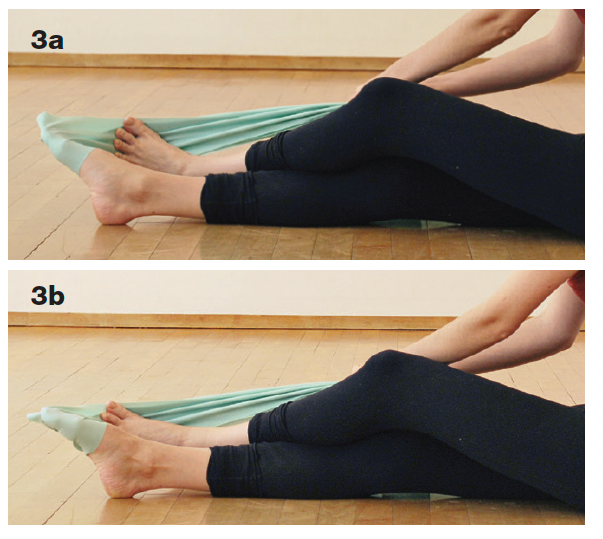
3. Supination, or sickling: Use one foot as an anchor to supinate the foot with resistance. With legs extended, wrap the band around your right toes. Cross your left foot over your right, allowing the left knee to bend as necessary to use the left foot to pull both sides of the resistance band out to the right, so your right foot pronates open. With a relaxed foot position, pull the right foot laterally against the band to supinate, then resist as you slowly pronate. Switch legs.
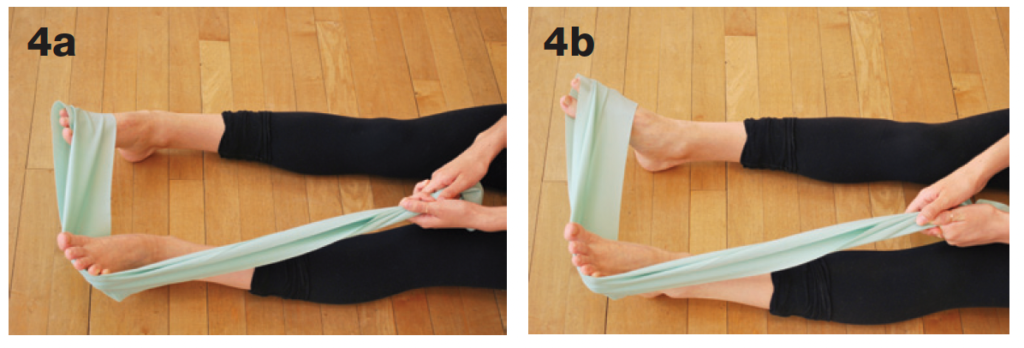
4. Change the direction of the band’s resistance for pronation, or winging. Set up the same exercise, but with legs side-by-side. Wrap the band around the right toes. Use your left foot to hook both sides of the band and pull it inward so you can position legs side-by-side and the band is pulling the right foot to a supinated position. Pull against the band to pronate, and then slowly return to the supinated position.
Don’t Forget the Core!
Ankle strength doesn’t mean a thing without correct alignment and a solid core. “I wish everyone would do side planks on their forearm every day,” says Alway. “It’s just so good for so many different kinds of stability.”
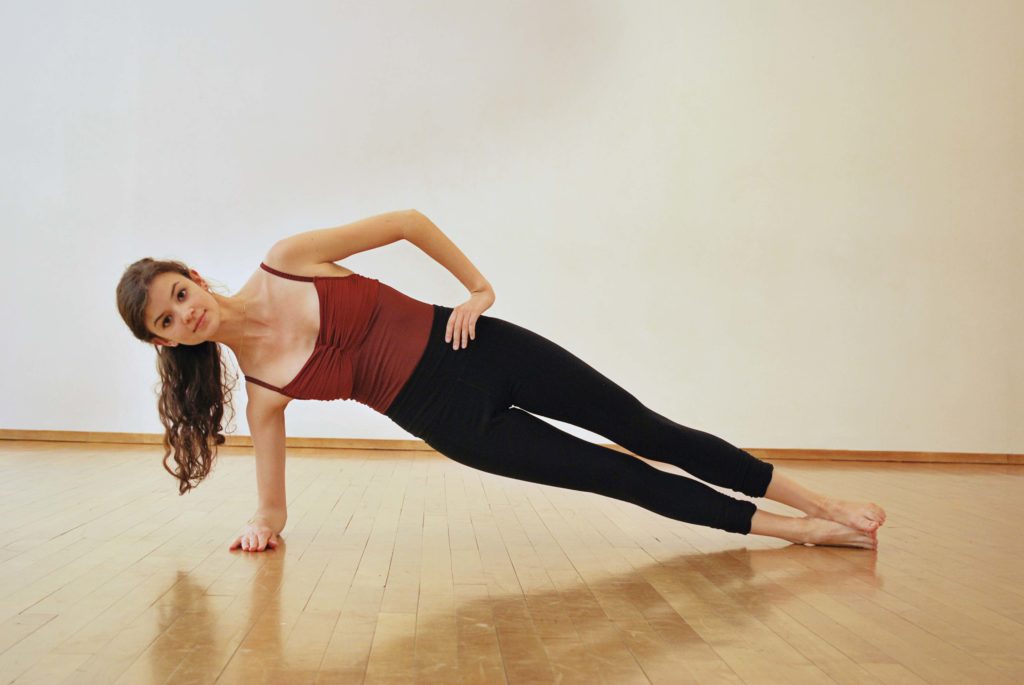
She recommends holding for one minute on each side, with the shoulders stacked over the bottom elbow, pushing the bottom hip toward the ceiling. Start on the forearm to make sure you have correct shoulder placement before trying the full side plank with the wrist under the shoulder.

