As a professional dancer and choreographer, Patricia Dye often videotaped her pieces to judge what worked. Now a dance teacher at Science Skills Center High School in Brooklyn, New York, she has found video as useful for assessing and promoting student growth as it was for perfecting her own choreography.
Current video cameras are inexpensive, compact and make shooting and editing easy.
A growing number of teachers are discovering the value of video in their K–12 classes. Some, like Dye, use it for both formative and summative assessment, allowing students to reflect on and improve their work, while providing teachers an extra reference point when it comes time for grading. Others use video to document classroom success for parents, administrators and donors. As a visual rather than descriptive record, video is an especially appropriate format for dance. But making the best use of it for assessing class progress requires thought and planning. Before you start shooting, carefully consider your goals and how video might best help you meet them.
Assessment within the classroom
Dye uses video to encourage her students to evaluate their own progress. Final dance compositions are taped at the end of each unit and students conduct self-assessments based on the video. “When they see themselves on the monitor, they say, ‘Did I really do that?’ or, ‘Oh, I didn’t do that step completely correctly,’” Dye says.
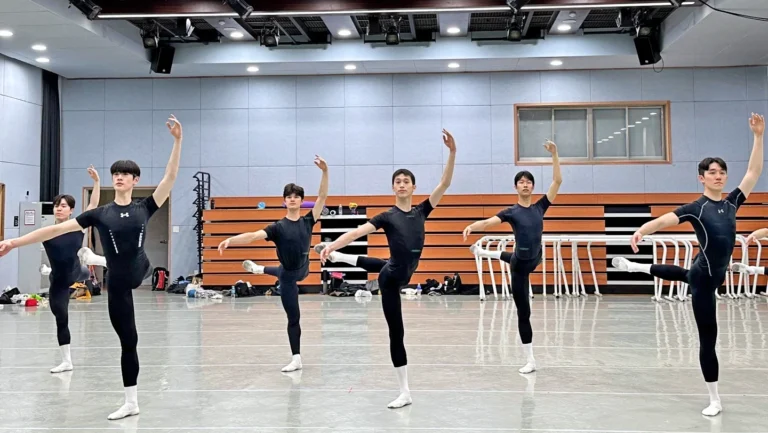
At P.S. 165 in Flushing, NY, Kathleen Isaac’s students watch themselves on video, identify three things to improve and then make the corrections. Their performances are then recorded a second time so they can watch and reflect on whether they made their corrections. Isaac says one of her goals is to eliminate paperwork because written self-assessments eat up precious class time and a student’s writing isn’t necessarily an accurate reflection of his or her dance ability. “It’s not really a fair assessment of student achievement in dance if I want them to use their bodies to solve problems,” she says.
Some teachers, like Rebecca Hill of Randolph IB Middle School in Charlotte, North Carolina, show video footage from years past to give current students a clear picture of what’s expected of them. “It lets my sixth-graders see what I want them to look like in eighth grade,” Hill says. Looking at past videos can also aid in the planning process, says Dye: “We look at the previous lessons and say, ‘What can we improve on?’”
Sharing success with an outside audience
While in-class assessment requires little more than shooting footage and playing it back, creating a video to share with outside observers takes more planning and effort. Think of it as a mini documentary that opens a window into how your students learn and grow.
“A moving image enables you to show product and process,” says Nelle Stokes, executive director of Magic Box Productions, a company that offers video services and training to arts organizations and schools. “You can see someone practicing something and mastering it and hear them talk about that process. If you really want to advocate for what you’re doing, you need to show people.”
To begin with, you’ll need to determine who your intended audience is and what your message will be. What moments will best demonstrate your students’ learning? You might chronicle a unit from beginning to end and interview students about the process.
That’s what Sharon Scarlata, program manager with the New York State Alliance for Arts Education, did when she documented a recent dance residency with the dance and music performance group The Vanaver Caravan at Glenmont Elementary School in Bethlehem, NY. “Over time you begin to know which angles work best and what questions will help students open up,” she says.
How video impacts the learning environment
Educators say that while some students may initially find the camera distracting, it ultimately ends up helping them focus. “I’ve seen students, particularly adolescents, be more reflective on camera than off camera,” Stokes says. “It elevates the moment. They are being taken seriously enough to be asked a thoughtful question on camera.” Isaac adds that because video is so central to kids’ everyday experiences, it provides a familiar, fun way into the material. “It’s a good way to challenge kids who would otherwise get into trouble,” she says.
In fact, when it comes to shooting and editing, students may be your most valuable resources. “You have a whole roomful of people who probably know how to do things with technology that you don’t,” says Stokes. “They’re excited, they’re eager. Kids are used to documenting all aspects of their lives, good or bad, and sharing them.” DT
Equipment and Editing 101
Getting started
- Most computers come with editing software—iMovie on Macs and Movie Maker on PCs. Both have easy “how-to” instructions.
- Flip Video Camcorders and Kodak’s high-definition Zi8 Pocket Video Cameras are inexpensive and easy to use.
- You can use an external mic with the Zi8 for clearer sound.
Shooting and editing tips
- When filming, keep footage short so it’ll be easier during editing to find the parts you want to use.
- Use a tripod to keep the camera stable. If zooming, do it smoothly.
- If using the recorded sound as your soundtrack, limit distracting noises (chatter, fans, chairs moving, etc.).
- When editing, use only the best moments of your footage to keep viewers engaged.
- When splicing, make sure not to cut the completion of important lines and movements. If the movement’s peak is obscured, choose a different shot.
Michelle Vellucci writes about dance and the arts in New York City. She holds a master’s in dance and education from the University
at Buffalo.
Photo courtesy of Kathleen Isaac.


